Bubble Painting DIY for Kids and Adults!

Bubble Painting DIY for Kids and Adults!
Easy DIY and Fun Activity!

Oh is this ever fun! It is easy to do and uses easy to find materials. You can dress it up a bit or just do it as a fun activity in the backyard with the kids or grandkids!
That's what I am doing tomorrow! :) They will love it!


Bubble Painting DIY
Materials:
Paint- I tried watercolor, acrylic, gouache and water-soluble ink (individually) and they all worked pretty much the same. The watercolor generally is more transparent and the gouache is opaque and matte so they do have slightly different effects. I suspect any water-soluble paint would work fine.
Plastic Cups
Straws
Water
Dawn Dish Soap
Paper- I used watercolor paper and also tried it out on paper envelopes, poster paper. If you want to dress it up, use better quality watercolor paper. To use just for fun with the kids- any paper would work- thinner paper might buckle from the moisture just as a heads up. I plan on taking a roll of poster paper to my grandkids and cover a picnic table with it and let them blow bubbles on that.
Steps:
1. Fill cups with a couple inches or so of water. Add a squirt of dish soap and some paint. If you are doing this with young kids, use non-toxic paint in case they accidentally drink the bubbles. You could also, with young kids, use the bubble wand dipped in the paint mixture if they are too young to just blow with the straw. The amount of paint you use does not have to be exact- just judge by what it produces and decide whether it needs more paint. If I were to make a guess, I would say I started off with ½ - 1 tsp paint to a cup of water + 1 tsp dish soap.
2. Lay the paper out on a flat surface, with straw in the cup or by using the wand, blow bubbles onto the paper. I used the cup and would blow bubbles in the cup and let it overflow onto the paper. I had a plastic fork that I would use to take a blob of the bubbles off the top of the cup and layout on the paper but you can let the kids just blow and let it drop on to the paper. There is no right or wrong way. Let dry slightly. Layer another color. Repeat. Once dry, flatten under heavy books and cut into notecard size paper and use for notecards!
For a little extra pizazz, I added a bit of shimmery mica to one of the colors.

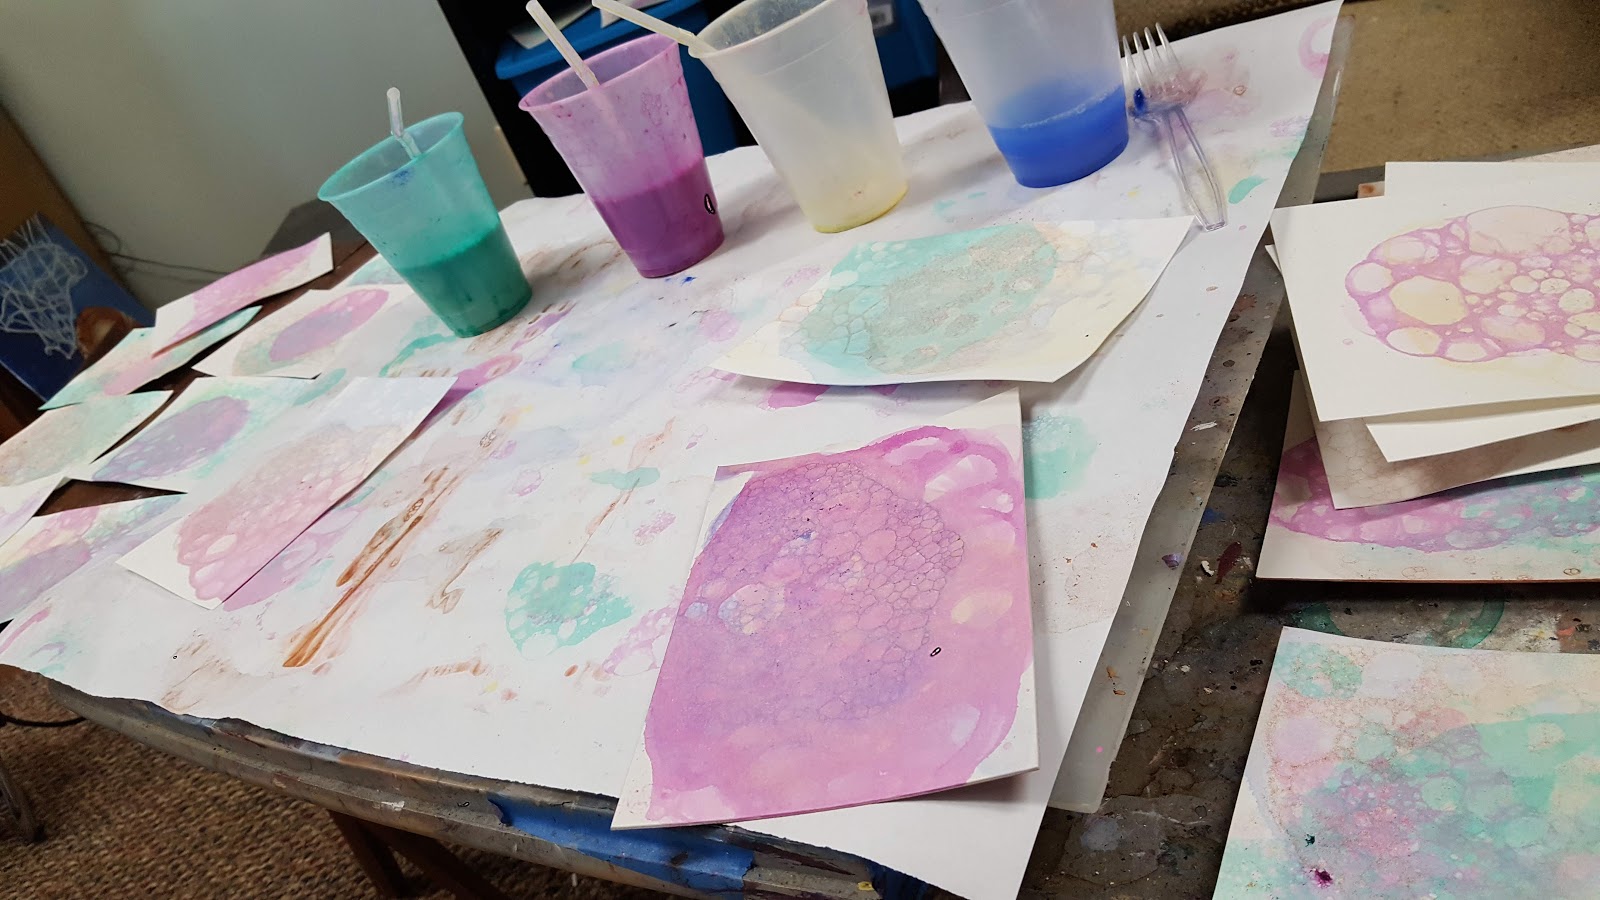


The photos don't convey all the subtlety of the layers of colors and designs. Some turned out really pretty!! I did tons of them as you might guess at the photos here. :)
If you, are anyone you know, are interested in a pet portrait or painting of your horse, please take a look at my artwork and website. I would love to talk about what you have in mind. I specialize in dogs, cats, horses, horse and rider, pet and owner, farm animal and wildlife paintings. I work from small custom stall signs to Life-Sized!
Find me on:
Facebook https://www.facebook.com/FreeReinArtStudio/
Etsy https://www.etsy.com/shop/FreeReinArtStudio
Pinterest https://www.pinterest.com/sue_steiner/
Instagram https://www.instagram.com/freereinart/
Twitter https://twitter.com/saveaface
Website: https://www.horseartonline.com
Update: New photos of my grandkids having a blast with bubble painting!
 |
| Bubble Painting! Great fun! |
 |
| Bubble Painting with kids! |


Comments